You might have heard the word “storyboard” and probably have no idea what it means. In this article, we’ll look at what storyboards are and how you use them in explainer videos to make your videos better!
Whenever you start any kind of video content, you need to plan ahead to get a general idea of where you’re heading and what you’re trying to achieve. Basically, get a glimpse into how your story or video will unfold.
Same way as building a house, you don’t just start laying bricks randomly, you first come up with a plan.
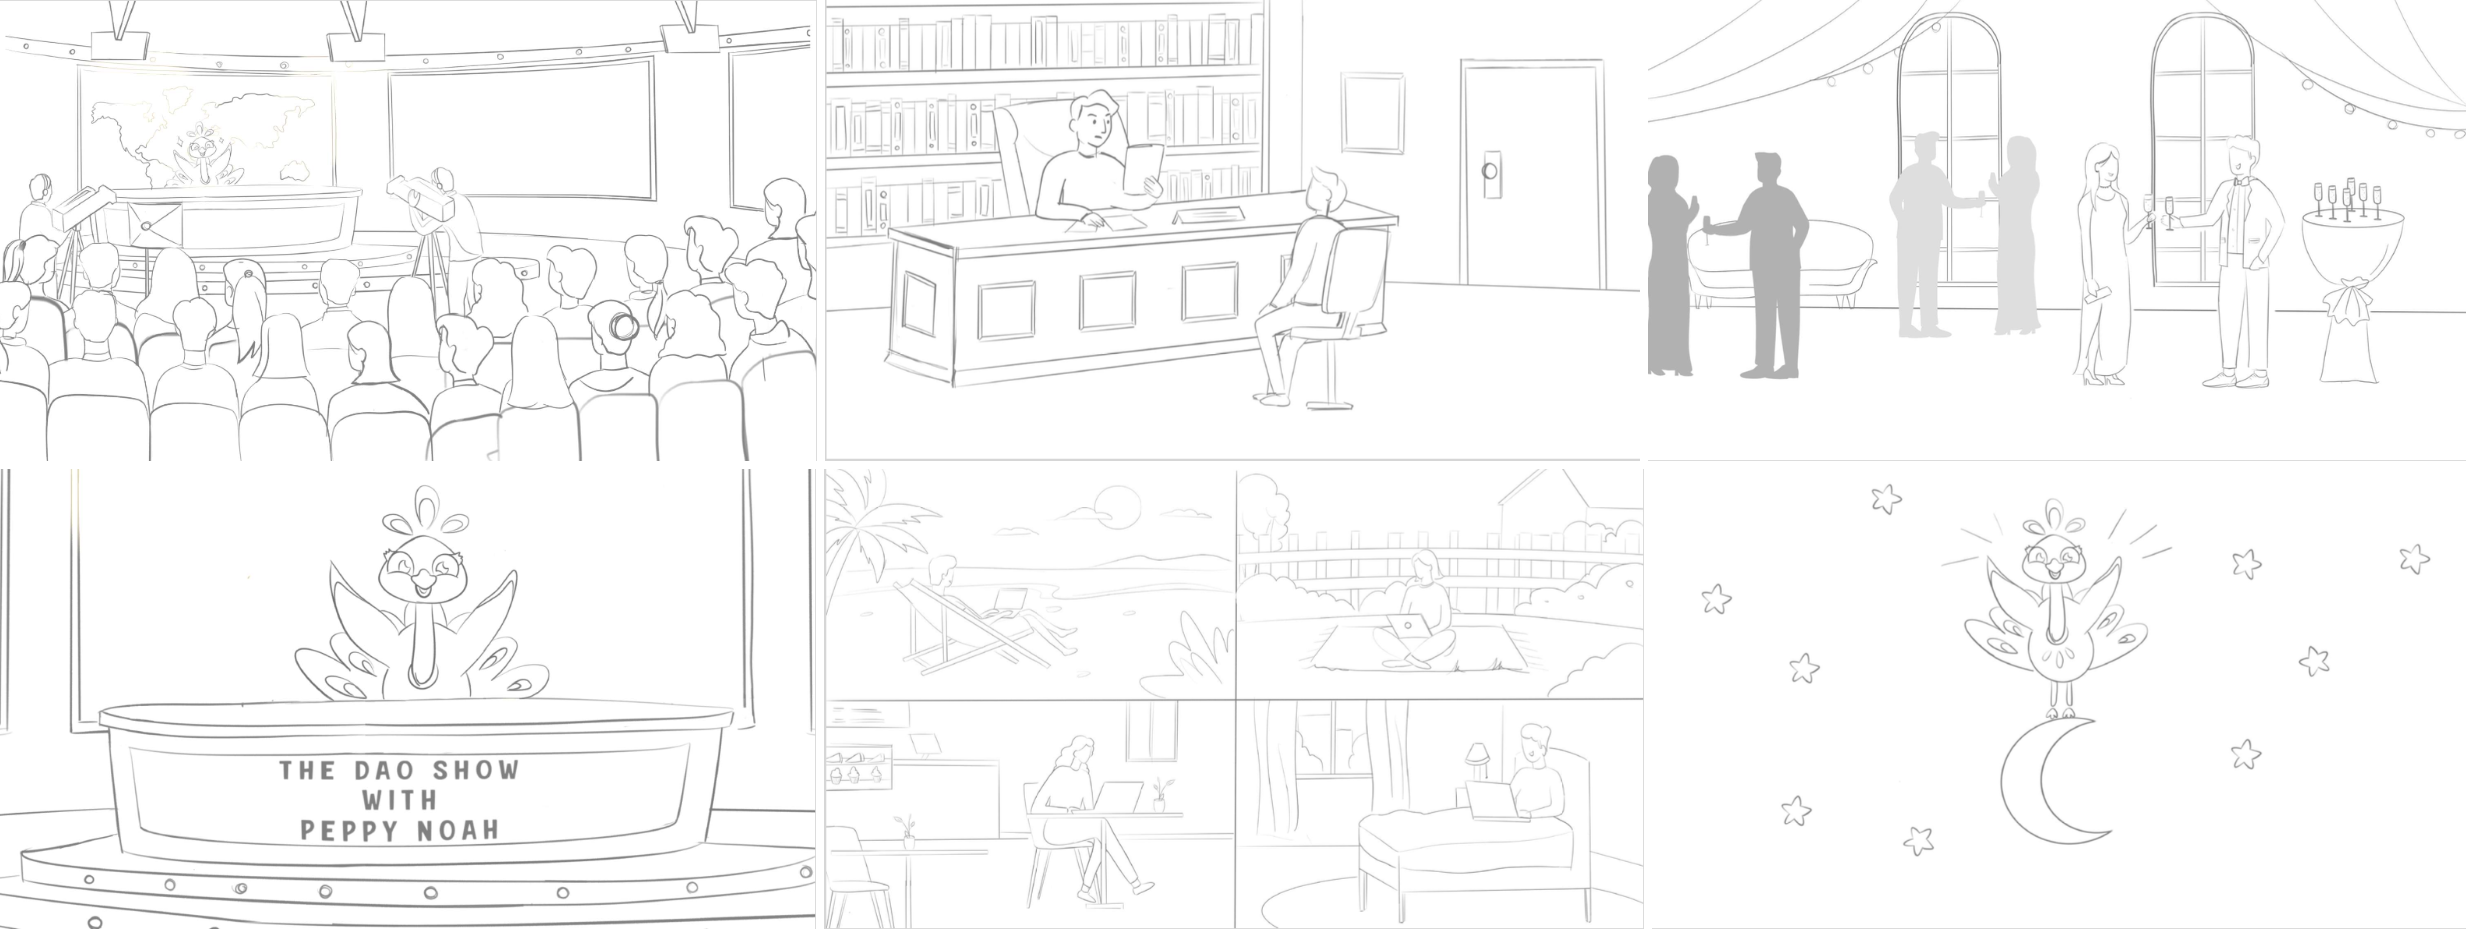
So during the pre-production phase of your explainer video, you use storyboards to plan how each scene will look like. A storyboard is basically a sequence of drawings for each scene.
So first, you take your existing script and break it down into different scenes.
Then, you start drawing and imagining how each scene should look like. This is where you can get really creative and try a lot of different things and ways to show your story visually.
To do this, you only need a piece of paper and a pencil and that’s about it, especially the first few versions until you get to a very good point where you’re happy. You can also just download an existing template, I’m linking to a simple-to-use template (add link here) that you can download for free. A template will usually have a few rectangles for each scene and some text area where you can write the VO text from the script for that scene.
To be clear, at this phase we’re only looking at sketches. So it doesn’t matter how good or bad your drawing skills are, you just need to come up with very creative ideas of how you want to show your story on screen.
This way you can easily look at it from start to finish and see if it flows well and makes sense. Especially if you have a voiceover recorded already, it will allow you to listen to it while previewing your video before you get into actual production.
This is a creative process, so don’t expect it to be perfect the first time, you’ll always come back and make changes, maybe even rearrange some scenes around.
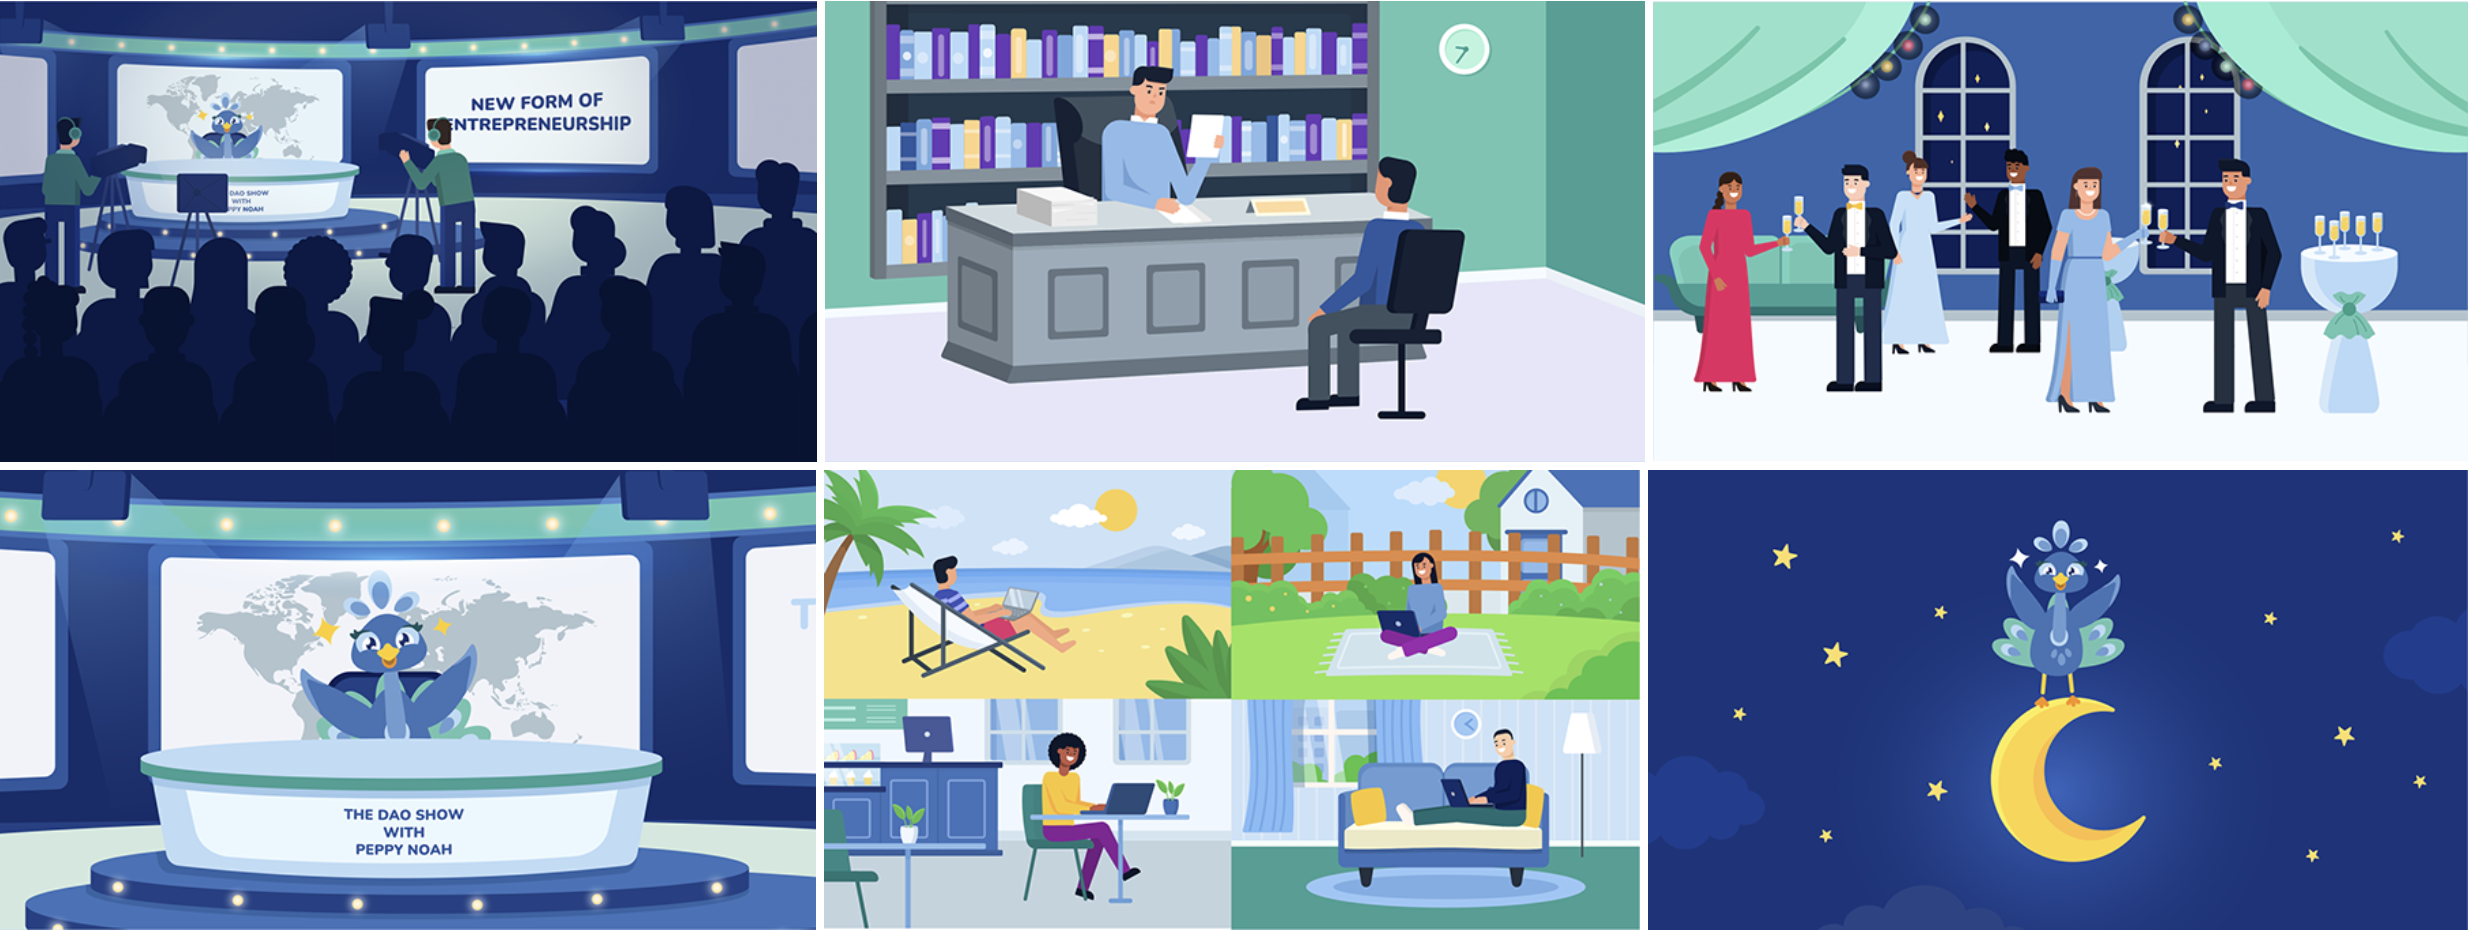
Once sketches are done and approved by the client, that’s when an illustrator from our team will start creating fully designed scenes with all the graphics. As I said before, sketching is where you can get very creative, while all the steps that come afterwards are literally just executing the plan.
I highly recommend you sketch out your video and go through the storyboards phase, I guarantee you it will make your video so much better and bring everyone involved a lot more clarity.
Don’t worry if you’re not too creative, whenever you hire an explainer production company, they usually handle this phase for you. And as you can imagine here at The Explainer Company, we have quite a bit of experience with visual storytelling!
To find out more, check out our entire Explainer Series on YouTube for free or check out our blog Explainer Guides where we go even deeper and cover everything related to Explainer Videos.
And if you want to get an amazing explainer video for your company to stand out from all the noise, produced by a professional and experienced team with over 10+ years in the industry and more than 400+ videos produced for clients all over the world, then browse our website, check out our portfolio and get in touch!
